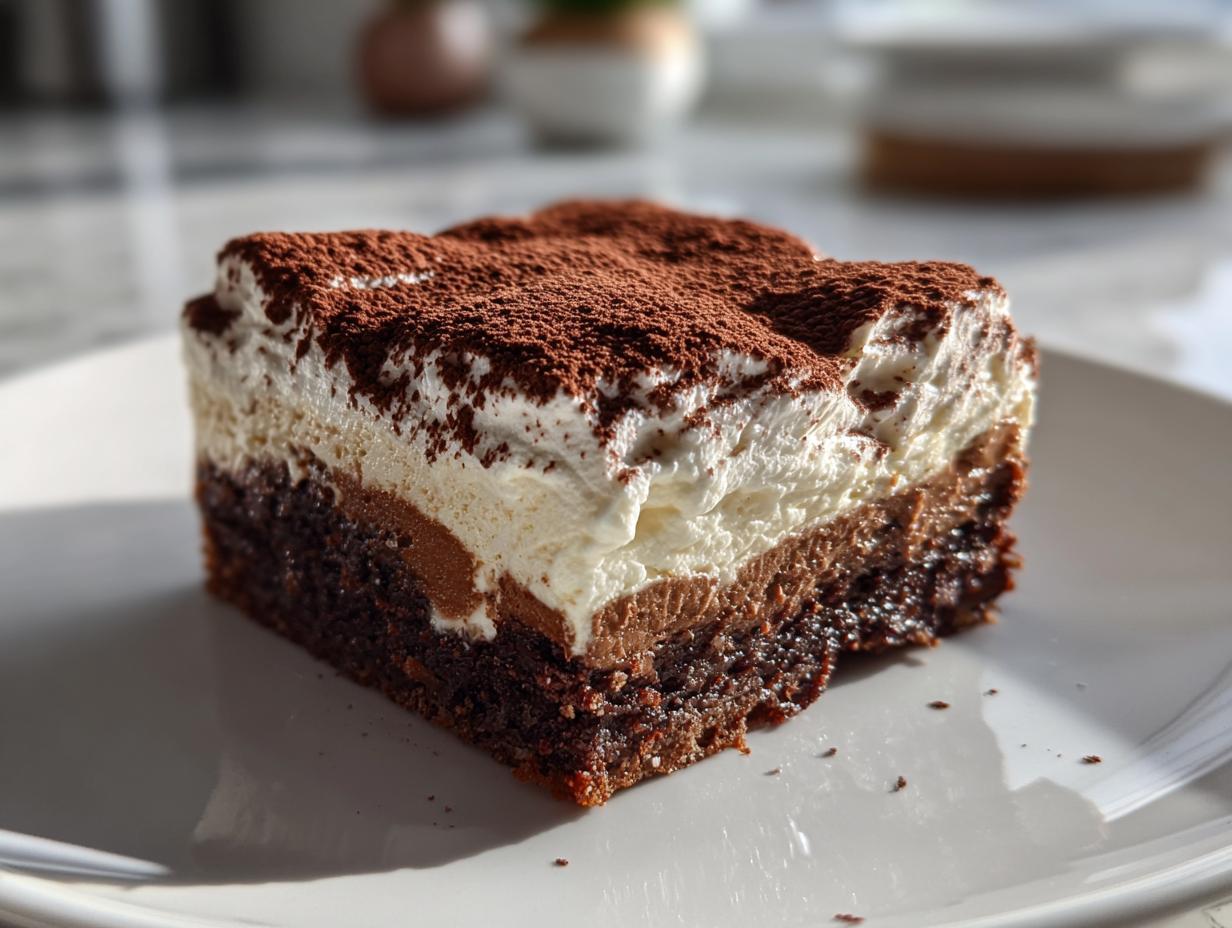
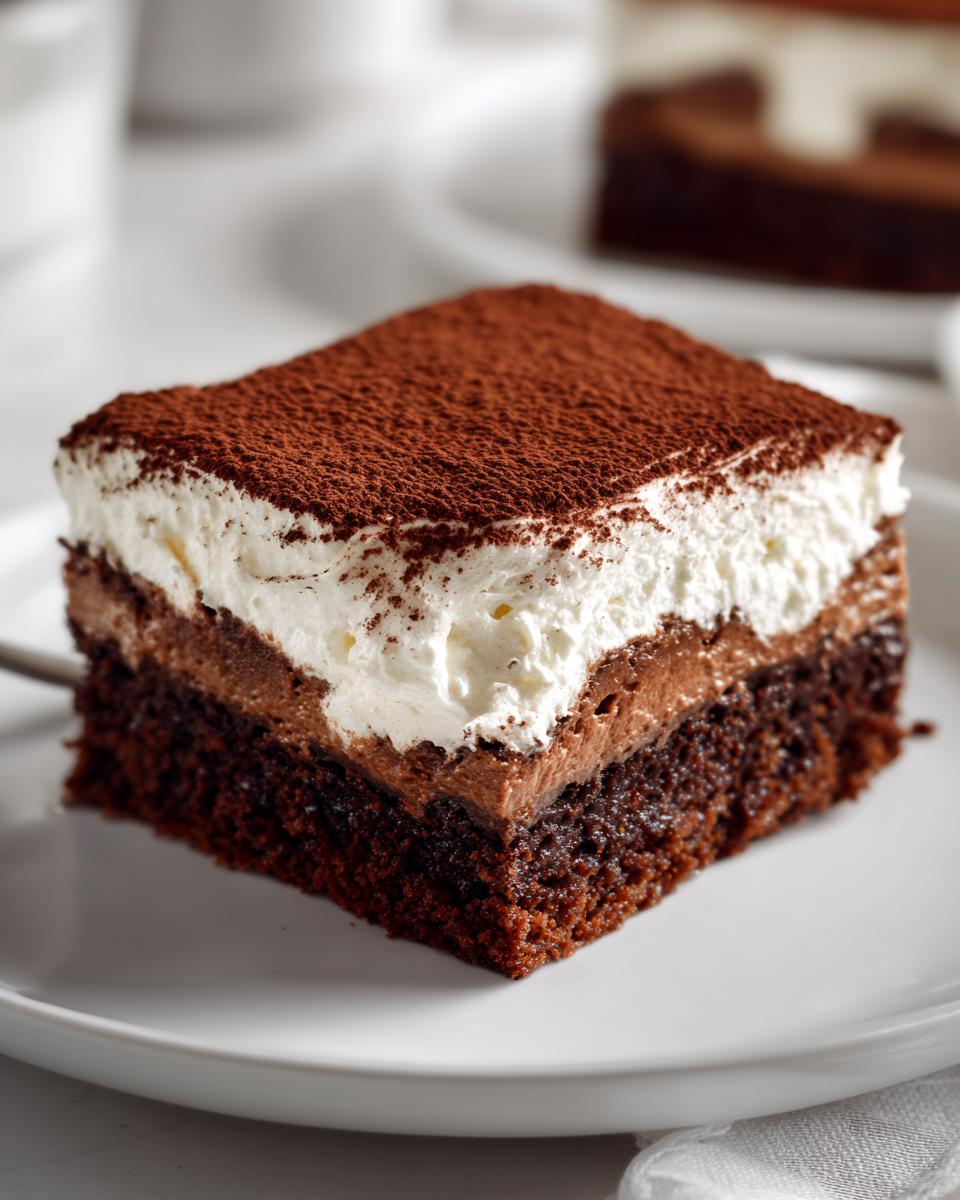
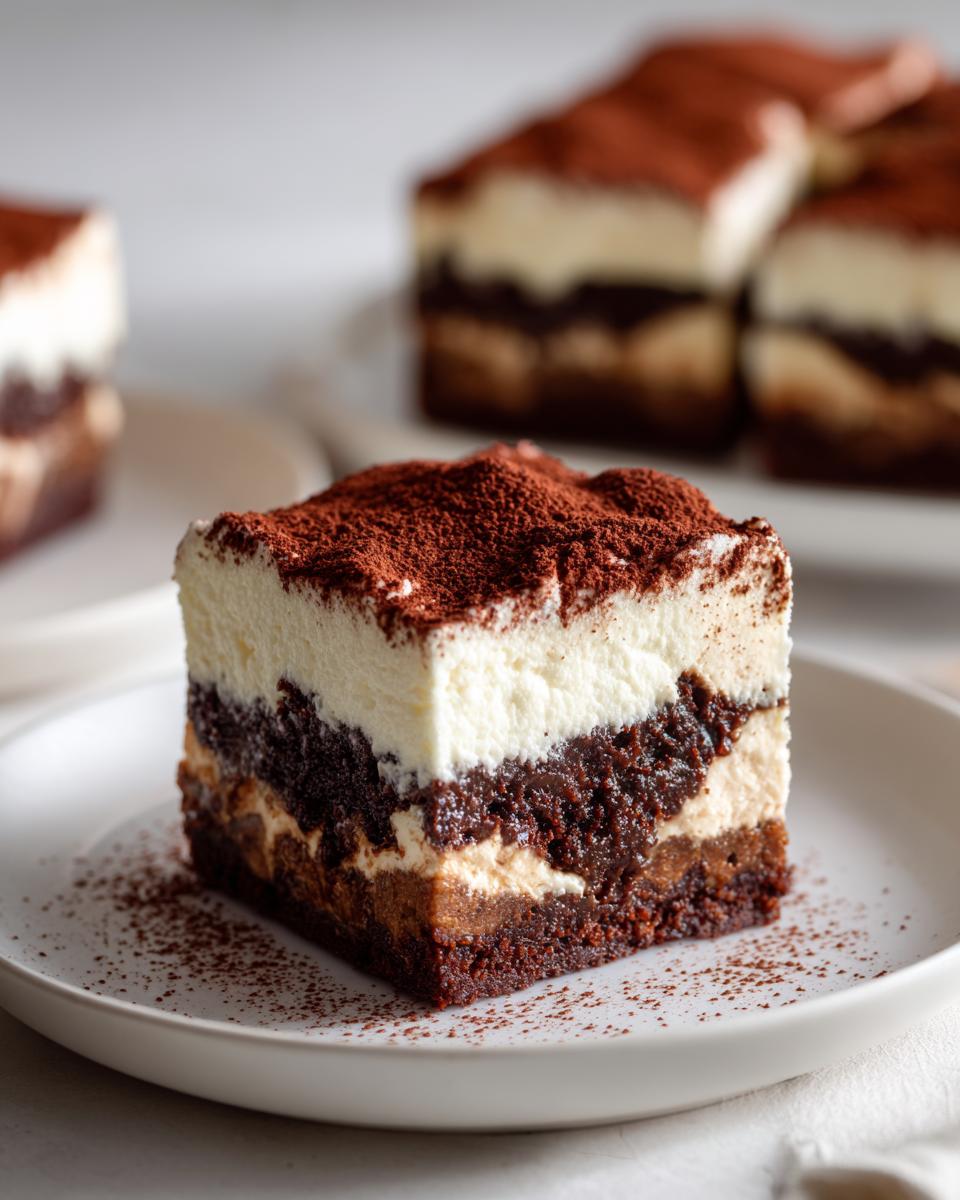
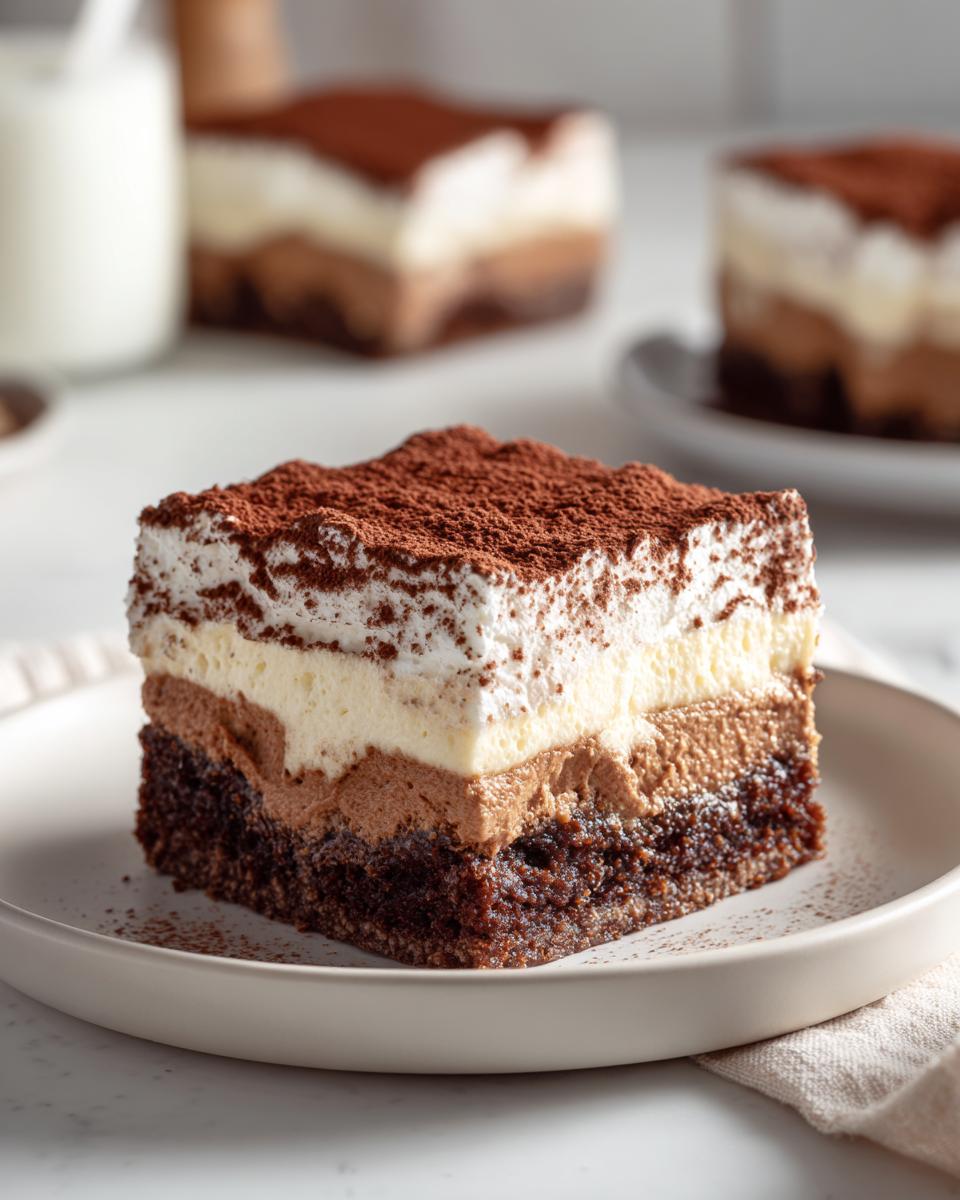
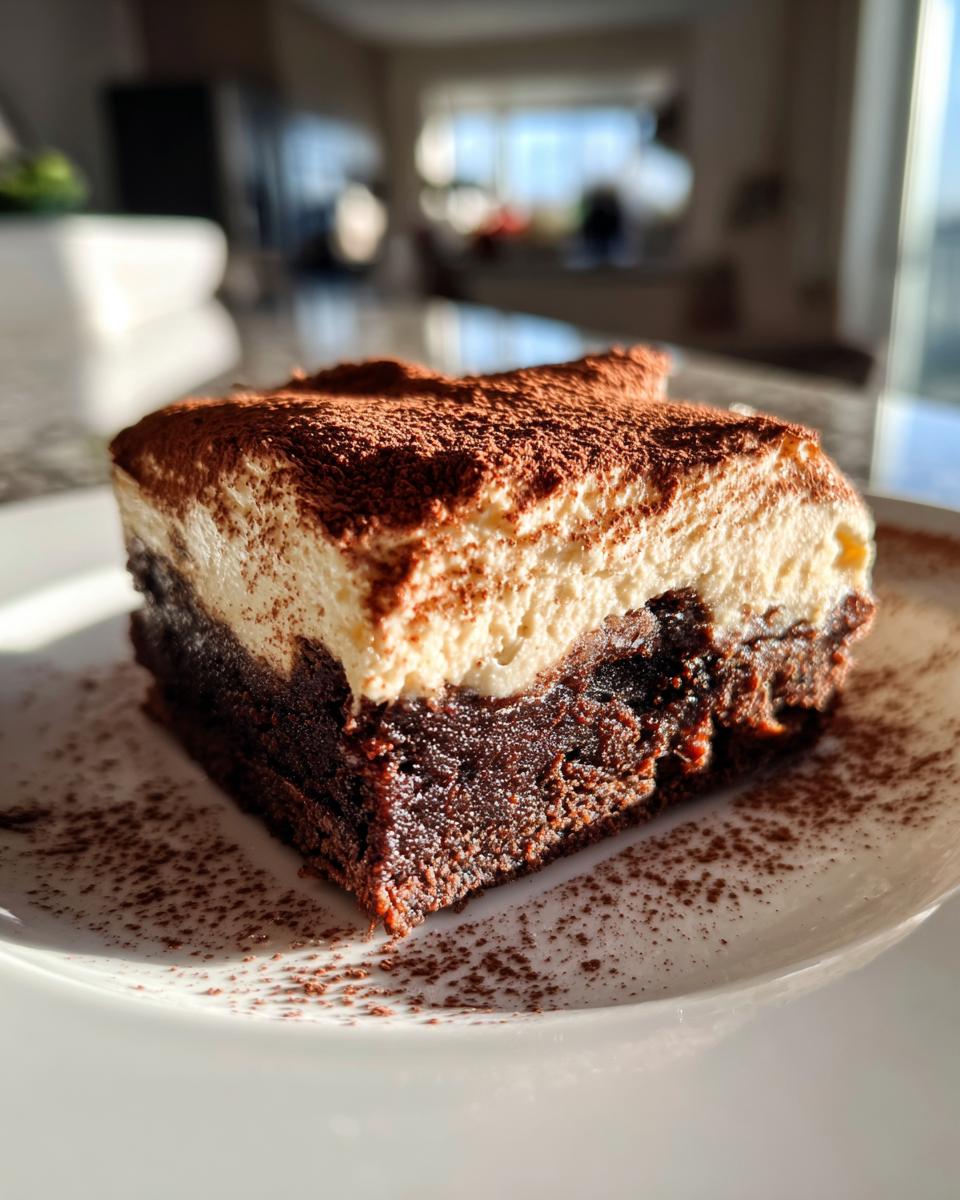
Oh my goodness, have you ever had one of those moments where two incredible desserts collide in the most magical way? That’s exactly what happened when I first tried combining my love for rich, fudgy brownies with the creamy coffee kick of classic tiramisu. These tiramisu brownies are my happy accident – the kind of dessert that makes you close your eyes and savor every bite. I created this recipe after one too many late-night baking experiments (and maybe one too many cups of coffee), and now it’s the first thing my friends request for potlucks. The secret? That dreamy mascarpone layer sandwiched between two chocolatey brownie layers, all topped with fluffy whipped cream. Trust me, once you try these, you’ll understand why they’ve become my signature treat!
Why You’ll Love These Tiramisu Brownies
Let me tell you why these tiramisu brownies are going to become your new obsession:
- Double the deliciousness – You get the rich chocolate intensity of brownies and the creamy coffee flavor of tiramisu in every bite
- That perfect texture – Fudgy brownie layers sandwiching a dreamy mascarpone filling, topped with cloud-like whipped cream
- Surprisingly simple – All the wow factor of a fancy dessert, but made with basic baking steps anyone can follow
- Instant crowd-pleaser – I’ve never brought these to a gathering without getting recipe requests (and empty pans!)
Seriously, what’s not to love? It’s like having your coffee and eating it too!
Ingredients for Tiramisu Brownies
Okay, let’s gather our goodies! Here’s what you’ll need to make these heavenly tiramisu brownies (and yes, every single ingredient matters – I learned that the hard way after a few failed batches!). I like to group everything together so I’m not scrambling mid-recipe:
For the Brownie Layers:
- 1 cup all-purpose flour (spooned and leveled – no packing it down!)
- 1/2 cup cocoa powder (I use Dutch-processed for extra richness)
- 1/2 teaspoon salt (trust me, it makes the chocolate pop)
- 1 cup unsalted butter, melted (and slightly cooled)
- 2 cups granulated sugar
- 4 large eggs (room temperature – cold eggs can make your batter weird)
- 2 teaspoons vanilla extract (the good stuff, not imitation)
- 1/2 cup strong brewed coffee, cooled (this is our tiramisu magic!)
For That Dreamy Mascarpone Layer:
- 8 ounces mascarpone cheese (full-fat for maximum creaminess)
- 1/4 cup powdered sugar
- 1 teaspoon instant coffee granules (or espresso powder if you’re feeling fancy)
For the Whipped Cream Topping:
- 1/2 cup heavy cream (chilled – it whips better when cold)
- 1 tablespoon cocoa powder for dusting (because presentation matters!)
Quick Sub Note: No mascarpone? Full-fat cream cheese works in a pinch, though it’ll be slightly tangier. And if you’re out of brewed coffee, just dissolve 2 tsp instant coffee in 1/2 cup hot water and let it cool.
Equipment Needed
You probably already have most of what you need for these tiramisu brownies right in your kitchen! Here’s my go-to list:
- 9×13-inch baking pan (my trusty metal one works best for even baking)
- Mixing bowls (one big one for batter, medium for the mascarpone layer)
- Whisk and rubber spatula (for folding that batter just right)
- Measuring cups and spoons (baking is science, folks!)
- Electric mixer (stand or hand – for whipping that cream to perfection)
That’s it! Though I won’t judge if you want to add a cute apron to feel extra official – I always do.
How to Make Tiramisu Brownies
Alright, let’s get baking! I promise this isn’t as complicated as it looks – we’re just building delicious layers of happiness. Follow these steps, and you’ll have the most amazing tiramisu brownies that’ll make everyone think you’re a pastry chef!
Preparing the Brownie Batter
First things first – preheat that oven to 350F (175C) and grease your 9×13-inch pan. I like to use butter or baking spray, making sure to get into all the corners. Now, let’s make that batter:
- In a medium bowl, whisk together the flour, cocoa powder, and salt. Set this aside – we’ll come back to it.
- In your big mixing bowl, combine the melted (but slightly cooled) butter and sugar. Stir until they’re best friends – about 1 minute of vigorous mixing should do it.
- Add eggs one at a time, mixing well after each addition. This is KEY for that perfect texture. Then stir in the vanilla and cooled coffee.
- Now, gradually add your dry ingredients to the wet mixture. Here’s my secret: fold gently with a spatula just until combined. No overmixing! We want fudgy, not tough.
Layering and Baking
This is where the magic happens! Pour half of that glorious brownie batter into your prepared pan and smooth it out. Bake for 15 minutes – just until the edges start to pull away from the pan.
While that bakes, make your mascarpone layer:
- In a clean bowl, mix the mascarpone, powdered sugar, and instant coffee until smooth and dreamy.
- When your first brownie layer comes out (it’ll still be a bit jiggly – that’s fine!), spread this creamy mixture evenly over the top.
- Now carefully pour the remaining brownie batter over the mascarpone layer. I like to dollop it across the surface, then gently spread it with an offset spatula.
Back into the oven it goes for another 25 minutes. You’ll know it’s done when the top looks set and a toothpick comes out with moist crumbs (not wet batter). Let this cool completely before the next step – patience is hard, but worth it!
Adding the Whipped Cream Topping
Now for the crowning glory! Using your electric mixer, whip the chilled heavy cream until stiff peaks form – it should hold its shape when you lift the beaters. Spread this cloud of deliciousness gently over your cooled brownies.
Here’s my pro tip: pop the whole pan in the fridge for at least an hour before slicing. The chill helps the layers set, giving you those picture-perfect squares. Right before serving, dust with cocoa powder through a fine sieve for that classic tiramisu look. Oh, and prepare for compliments!
Tips for Perfect Tiramisu Brownies
After making these tiramisu brownies more times than I can count (okay fine, maybe I have a problem), I’ve learned a few tricks that make all the difference:
- Room temp eggs are non-negotiable – Cold eggs can make your batter curdle (been there, cried over that). Just set them out 30 minutes before baking.
- Cool that coffee completely – Adding hot coffee will start cooking your eggs. I stick mine in the fridge for 10 minutes while prepping other ingredients.
- Chill before slicing – I know it’s tempting, but waiting at least an hour makes clean cuts possible. Otherwise, you’ll have a delicious mess!
- Use a hot knife – For extra-clean slices, run your knife under hot water and dry it between cuts.
Follow these, and you’ll have brownies worthy of an Italian cafe!
Variations of Tiramisu Brownies
Want to switch things up? Here are my favorite ways to play with this recipe when I’m feeling adventurous (or just cleaning out the pantry):
- Espresso power-up – Swap the brewed coffee for 2 teaspoons of espresso powder mixed into the batter. The flavor really pops!
- Dark chocolate dreams – Use dark cocoa powder instead of regular for an extra rich, almost bittersweet depth that coffee lovers adore.
- Boozy twist – Add a tablespoon of Kahlua or amaretto to the mascarpone layer for an adult-only version (my book club’s favorite).
- Nutty surprise – Fold 1/2 cup chopped toasted hazelnuts into the batter for crunch – it’s amazing with the coffee flavors.
The beauty of this recipe? It’s like your favorite little black dress – endlessly adaptable for any mood! You can find more dessert inspiration on my Pinterest.
Serving and Storing Tiramisu Brownies
These tiramisu brownies are absolute perfection served chilled – the layers hold together beautifully when cold. I always dust with extra cocoa powder right before serving for that gorgeous finishing touch. As for leftovers (if you’re lucky enough to have any!), store them in an airtight container in the fridge for up to 3 days. They actually taste even better the next day as the flavors meld! For longer storage, you can freeze individual squares wrapped tightly in plastic for up to a month – just thaw overnight in the fridge before serving.
Nutritional Information
A little heads-up: these indulgent tiramisu brownies are definitely a treat! Each serving (about one 3-inch square) contains roughly 320 calories. Remember, these numbers are just estimates – your actual count might vary slightly depending on the exact ingredients you use. But hey, some things are worth every delicious calorie!
Frequently Asked Questions
Can I use instant coffee instead of brewed coffee?
Absolutely! Just dissolve 2 teaspoons of instant coffee or espresso powder in 1/2 cup hot water and let it cool completely before adding to the batter. Sometimes I even prefer this because the coffee flavor comes through more intensely!
How do I prevent soggy brownies?
The key is making sure your first brownie layer bakes just until set (15 minutes usually does it) and letting everything cool completely before adding the whipped cream. Also – don’t skip the chilling step! Those cold hours help all the layers firm up perfectly.
Can I make these ahead of time?
Oh honey, they’re actually BETTER the next day! The flavors have time to mingle overnight in the fridge. Just hold off on the whipped cream topping until you’re ready to serve for maximum freshness.
What if I can’t find mascarpone?
Full-fat cream cheese works in a pinch, though the texture will be slightly less creamy and more tangy. I’ve also had success mixing 4 oz cream cheese with 4 oz ricotta when desperate – not quite the same, but still delicious!
Why did my mascarpone layer sink into the brownie?
This usually happens if the first brownie layer isn’t baked enough before adding the mascarpone. Next time, bake until the edges look set and the center just barely jiggles. And spread that mascarpone mixture gently – no need to press down!
Feedback
I’d love to hear how your tiramisu brownies turned out! Snap a photo or leave a rating – it makes my day to see your creations. You can find more dessert recipes here.
Print
Irresistible Tiramisu Brownies with 2 Dreamy Layers
- Prep Time: 20 minutes
- Cook Time: 40 minutes
- Total Time: 1 hour
- Yield: 12 servings 1x
- Category: Dessert
- Method: Baking
- Cuisine: Italian-American
- Diet: Vegetarian
Description
Tiramisu brownies combine the rich flavors of chocolate brownies with the creamy coffee taste of tiramisu. This dessert is perfect for coffee and chocolate lovers.
Ingredients
- 1 cup all-purpose flour
- 1/2 cup cocoa powder
- 1/2 teaspoon salt
- 1 cup unsalted butter, melted
- 2 cups granulated sugar
- 4 large eggs
- 2 teaspoons vanilla extract
- 1/2 cup strong brewed coffee, cooled
- 8 ounces mascarpone cheese
- 1/4 cup powdered sugar
- 1 teaspoon instant coffee granules
- 1/2 cup heavy cream
- 1 tablespoon cocoa powder for dusting
Instructions
- Preheat your oven to 350°F (175°C). Grease a 9×13-inch baking pan.
- In a bowl, whisk flour, cocoa powder, and salt. Set aside.
- Mix melted butter and sugar until combined. Add eggs one at a time, then stir in vanilla.
- Gradually add the flour mixture to the wet ingredients. Stir until just combined.
- Pour half of the batter into the prepared pan. Bake for 15 minutes.
- While the brownie bakes, mix mascarpone, powdered sugar, and instant coffee in a bowl.
- Spread the mascarpone mixture over the baked brownie layer. Pour the remaining batter on top.
- Bake for another 25 minutes. Let cool completely.
- Whip the heavy cream until stiff peaks form. Spread over the cooled brownies.
- Dust with cocoa powder before serving.
Notes
- Use room temperature eggs for better mixing.
- Cool the coffee before adding to avoid cooking the eggs.
- Chill the brownies for cleaner slices.
Nutrition
- Serving Size: 1 brownie
- Calories: 320
- Sugar: 25g
- Sodium: 120mg
- Fat: 18g
- Saturated Fat: 11g
- Unsaturated Fat: 6g
- Trans Fat: 0g
- Carbohydrates: 35g
- Fiber: 2g
- Protein: 4g
- Cholesterol: 95mg