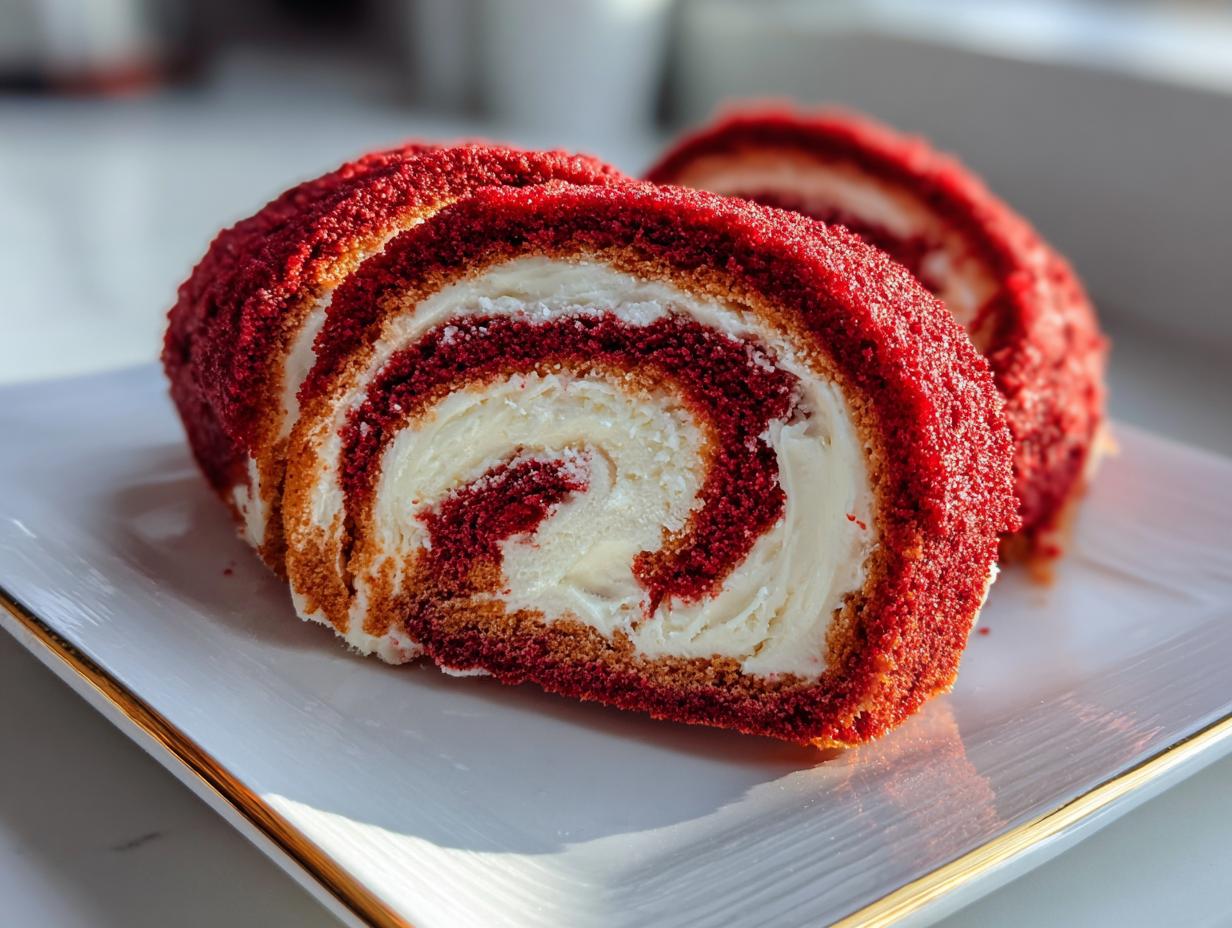
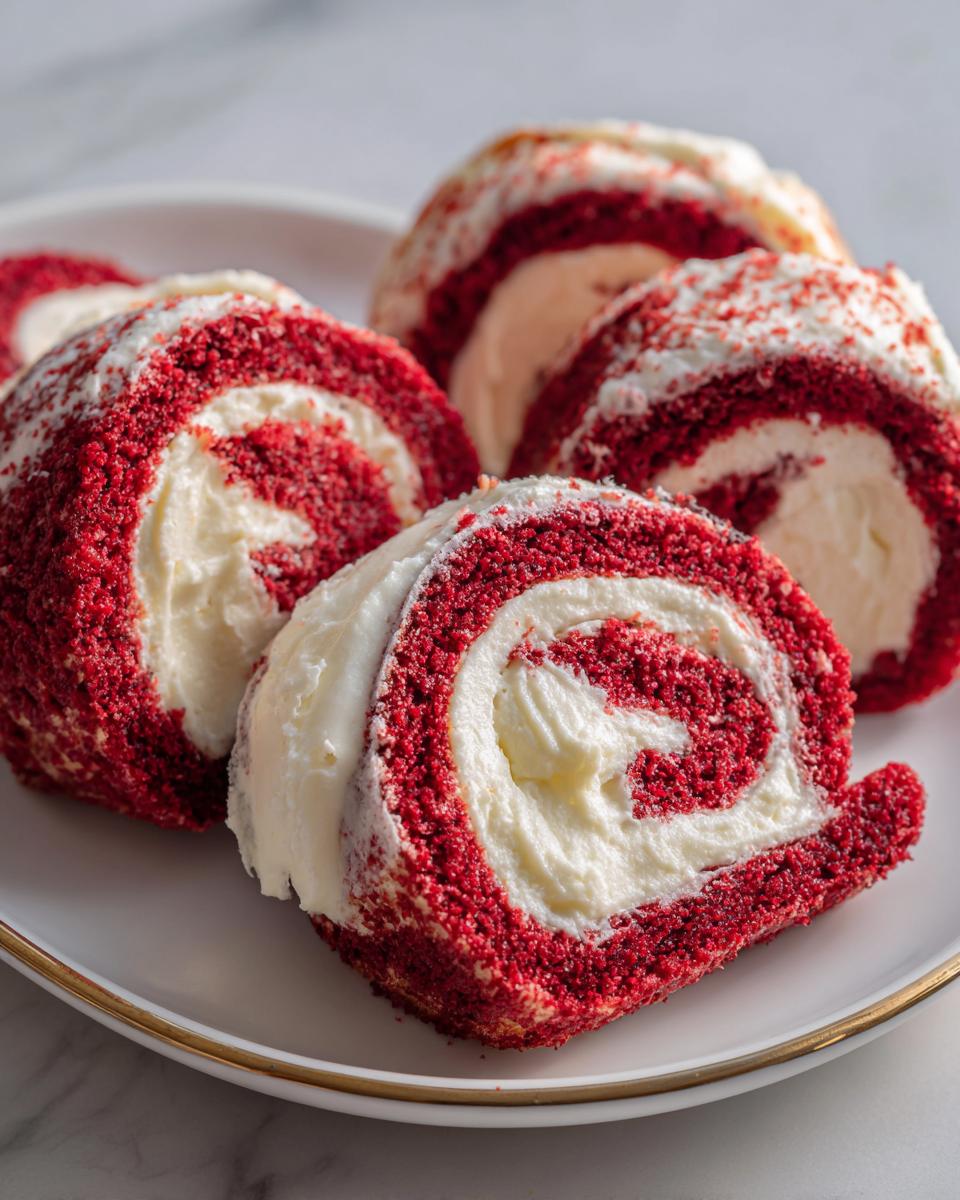
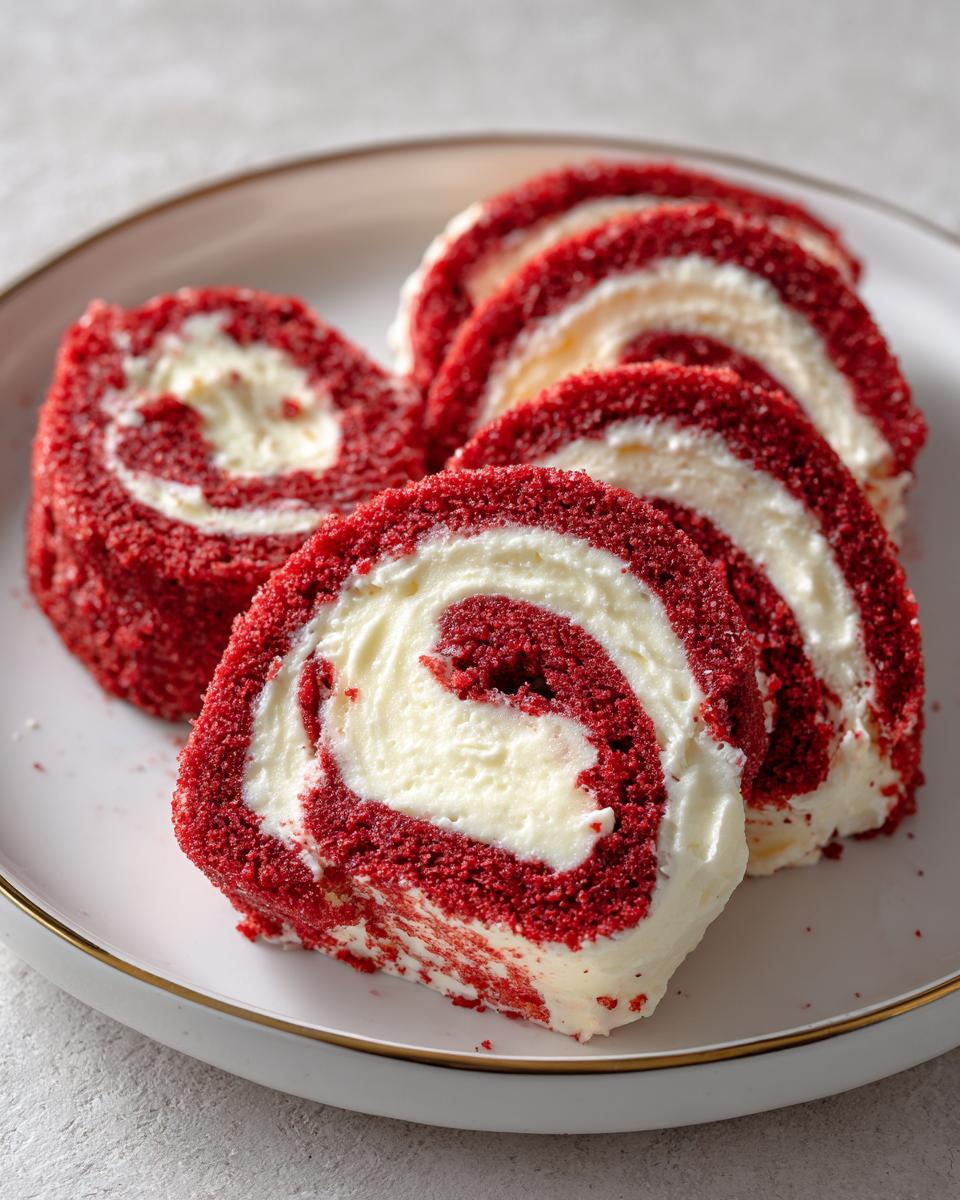
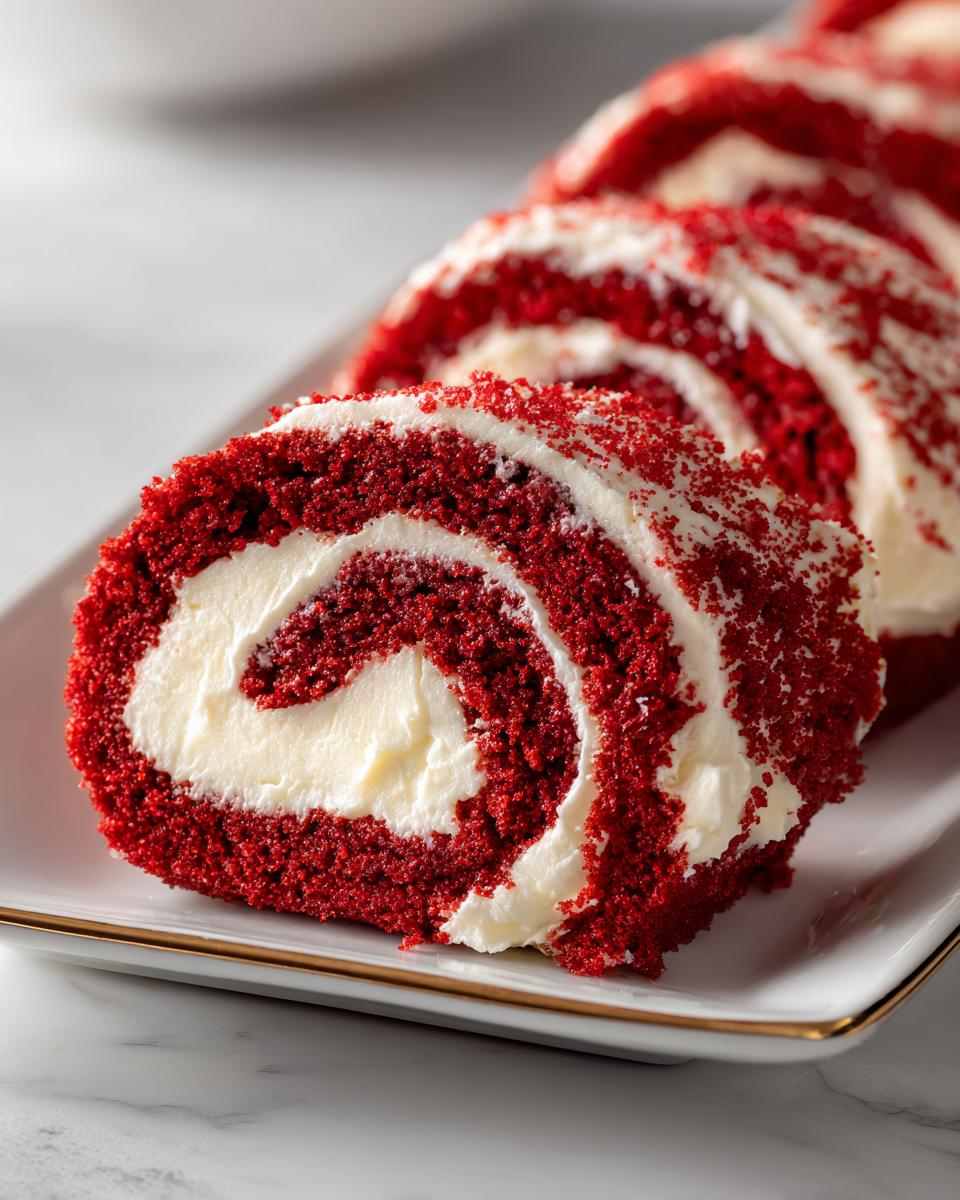
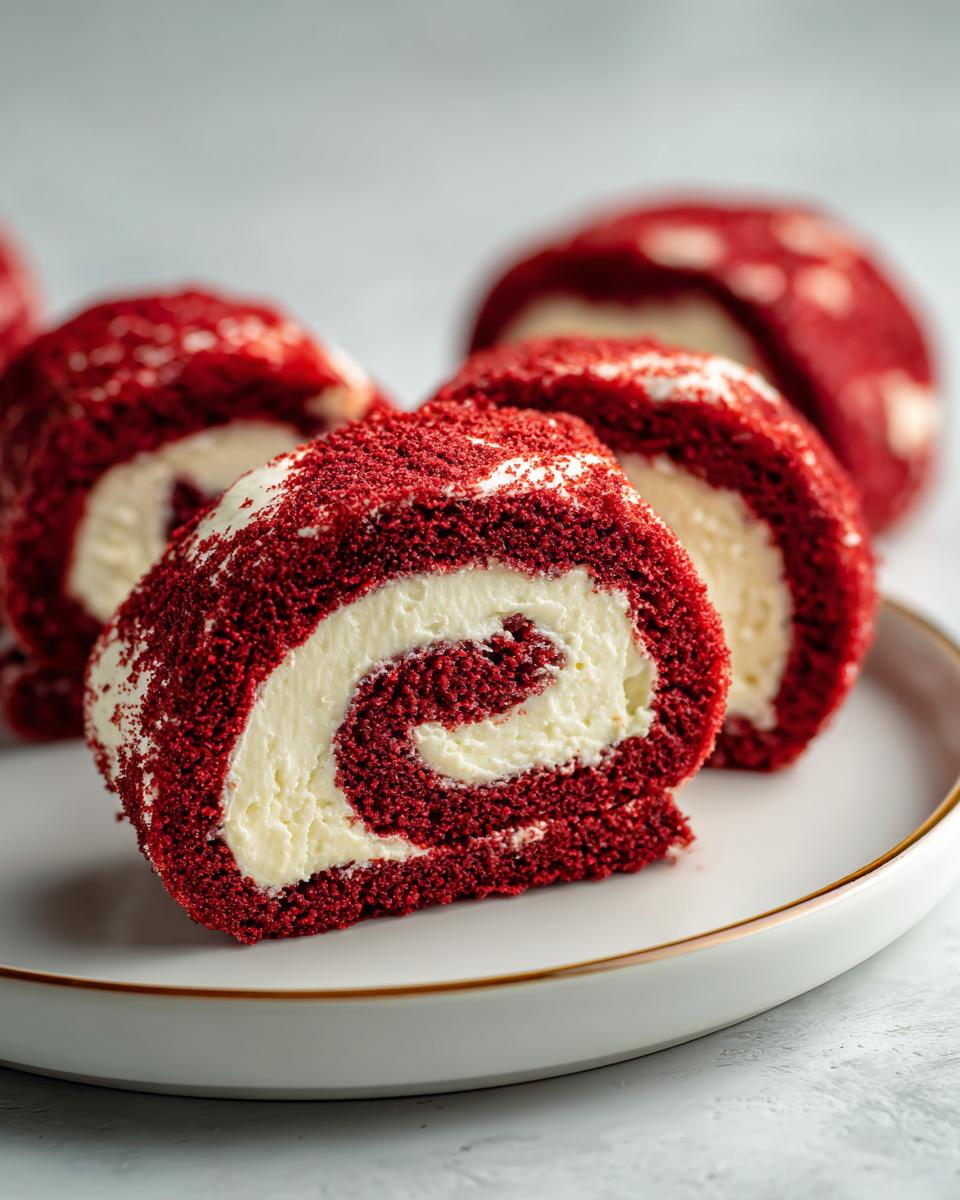
Oh my goodness, let me tell you about these red velvet rolls – they’re like little clouds of happiness with a creamy surprise inside! I first made these for a Christmas brunch years ago, and now my family won’t let me show up without them. That vibrant red color just makes everyone smile before they even take a bite. And that cream cheese filling? Absolute perfection – rich but not too sweet, melting into every fluffy layer of the roll. Whether it’s a holiday morning, baby shower, or just because Tuesday, these beauties disappear faster than I can say “seconds please!”
Why You’ll Love These Red Velvet Rolls
Trust me, once you try these, you’ll be hooked! Here’s why:
- Pillowy soft texture that practically melts in your mouth
- That gorgeous red color makes every bite feel like a celebration
- Simple steps – even if you’re new to yeast doughs, you’ve got this
- Cream cheese filling that’s rich but not overwhelming
- Total crowd-pleasers – I’ve never brought leftovers home, ever
Ingredients for Red Velvet Rolls
Gather these simple ingredients – I promise you probably have most in your pantry already! Here’s what you’ll need:
For the dough:
- 2 1/2 cups all-purpose flour (spooned and leveled)
- 1/4 cup granulated sugar
- 1 tsp fine sea salt
- 2 1/4 tsp active dry yeast (1 standard packet)
- 1/2 cup whole milk, warmed to about 110F
- 1/4 cup unsalted butter, melted and slightly cooled
- 1 large egg, at room temperature
- 1 tbsp unsweetened cocoa powder, sifted
- 1 tbsp red food coloring (gel works best!)
- 1 tsp pure vanilla extract
For the filling:
- 8 oz cream cheese, softened to room temp
- 1/4 cup powdered sugar, sifted
Ingredient Notes & Substitutions
Small swaps can make a big difference here! Gel food coloring gives that perfect vibrant red (liquid makes dough too wet). You could use Greek yogurt instead of cream cheese in the filling, but – warning! – the texture changes. Never skip the cocoa powder – even though it’s just a tablespoon, it gives that classic red velvet flavor. And please, please use real butter – margarine just won’t give you those soft, buttery layers we’re after!
How to Make Red Velvet Rolls
Okay, let’s get our hands dirty (well, red-stained at least)! Making these rolls is easier than you think – just follow these steps and you’ll have bakery-worthy results. The secret? Patience with the rising times – trust me, it’s worth the wait!
Preparing the Dough
First, let’s wake up that yeast! In a small bowl, combine your warm milk (test it on your wrist – it should feel comfortably warm, not hot) with the yeast and a pinch of sugar. Let it sit for about 5 minutes until it gets all foamy and bubbly. This is when I do my little happy dance because I know the magic is working!
In a big mixing bowl, whisk together your flour, sugar, salt, and that all-important cocoa powder. Make a well in the center and pour in your yeasty milk mixture, melted butter, egg, vanilla, and that gorgeous red food coloring. Stir with a wooden spoon until it comes together into a shaggy mess. Now comes the fun part – turn it out onto a floured surface and knead for about 5-7 minutes until it transforms into this smooth, slightly sticky ball of red velvet goodness. The dough should spring back when you poke it gently.
Shaping and Filling the Rolls
Place your beautiful red dough in a greased bowl, cover with a clean towel, and let it rise in a warm spot for about an hour until it doubles in size. This is the perfect time to make your filling – just beat the softened cream cheese and powdered sugar together until smooth.
Now the exciting part! Punch down the dough (so satisfying!) and roll it out into about a 12×16 inch rectangle on a lightly floured surface. Spread your cream cheese mixture evenly all over, leaving just a half-inch border around the edges. Starting from the long side, roll it up tightly like a jelly roll – go slow and keep it snug so you don’t get gaps in your spirals. Use a sharp knife (dip it in flour to prevent sticking) to slice into 12 even pieces.
Baking and Finishing
Arrange your gorgeous red spirals in a greased baking dish (I use a 9×13) with some space between them for rising. Cover lightly and let them puff up again for about 30 minutes – they should look nice and plump. Meanwhile, preheat your oven to 350F (175C).
Bake for 20-25 minutes until the tops are set and the edges are just starting to turn golden. Your kitchen will smell amazing! Let them cool for about 10 minutes before digging in – I know it’s hard to wait, but that cream cheese filling will be lava-hot right out of the oven. The hardest part? Deciding whether to eat them warm or chilled – both are absolutely heavenly!
Tips for Perfect Red Velvet Rolls
After making these more times than I can count, here are my foolproof secrets:
- Milk temperature matters! Too hot kills yeast, too cold won’t activate it. Aim for bathwater warm (110F).
- Watch the oven like a hawk – just 2 minutes too long can dry them out. They’re done when tops spring back lightly.
- Use dental floss to slice rolls cleanly – no squished spirals!
- Let dough rise in a warm spot – I turn my oven light on with the door cracked.
- Chill the log slightly before slicing – makes cutting those perfect swirls way easier!
Storing and Reheating
These red velvet rolls keep beautifully! Store them in an airtight container at room temperature for up to 3 days – if they last that long! For longer storage, wrap individual rolls tightly in plastic wrap and freeze for up to a month. When that craving hits, just pop one in the microwave for 10-15 seconds until the cream cheese gets all melty again. Absolute perfection!
Red Velvet Rolls FAQs
I get asked about these red velvet rolls all the time – here are the answers to the questions that pop up most often in my kitchen (and my DMs!):
Can I make these rolls ahead of time?
Absolutely! You’ve got two great options. Either prepare the dough through the first rise, then refrigerate overnight before shaping and baking in the morning. Or bake them completely, let cool, and freeze for up to a month. Just reheat frozen rolls in a 300F oven for 10 minutes – they’ll taste freshly baked!
Why is there cocoa powder in red velvet?
This is my favorite food history lesson! That single tablespoon of cocoa gives red velvet its signature flavor – slightly chocolatey but not overpowering. Back in the day, the cocoa reacted with acidic ingredients to create a reddish hue. Now we use food coloring, but the cocoa stays because it’s just that important to the taste!
Help! My rolls turned out dense – what went wrong?
Don’t worry – we’ve all been there! Usually it’s one of three things: yeast that didn’t activate properly (always test your milk temp), dough that didn’t rise long enough (be patient!), or over-kneading (stop when it’s smooth and elastic). Next time, try letting the dough rise in a warmer spot – I swear by my oven with just the light on!
Can I use liquid instead of gel food coloring?
You can, but you’ll need about 2-3 tablespoons of liquid to get that vibrant red, which might make your dough too wet. Gel coloring gives intense color with just a tablespoon. If you must use liquid, reduce the milk slightly to compensate. But trust me – gel is worth the extra trip to the store!
Why did my cream cheese filling leak out?
This usually happens if the rolls weren’t rolled tightly enough or if the filling was too soft. Make sure your cream cheese is softened but still holds its shape when spreading. And when rolling, go slow and keep tension – think “snug cinnamon roll” tightness!
Nutritional Information
Just so you know what you’re biting into! These numbers are estimates and can vary based on your specific ingredients. Per roll: about 220 calories, 10g fat (6g saturated), 28g carbs, and 4g protein. Not bad for something this delicious, right?
I can’t wait to see your beautiful red velvet rolls! Tag me @MyKitchenAdventures when you make them – I love seeing your creations and hearing what your family thinks. Nothing makes me happier than knowing these sweet little rolls are bringing joy to kitchens everywhere. Don’t forget to snap a picture before they disappear (because trust me, they will)! Happy baking, friends – may your rolls be fluffy and your cream cheese always at the perfect spreading temperature!

12 Irresistible Red Velvet Rolls That Steal Every Bite
- Prep Time: 1 hour 30 minutes
- Cook Time: 25 minutes
- Total Time: 1 hour 55 minutes
- Yield: 12 rolls 1x
- Category: Dessert
- Method: Baking
- Cuisine: American
- Diet: Vegetarian
Description
Soft and fluffy red velvet rolls with a rich cream cheese filling, perfect for any occasion.
Ingredients
- 2 1/2 cups all-purpose flour
- 1/4 cup granulated sugar
- 1 tsp salt
- 2 1/4 tsp active dry yeast
- 1/2 cup whole milk, warmed
- 1/4 cup unsalted butter, melted
- 1 large egg
- 1 tbsp cocoa powder
- 1 tbsp red food coloring
- 1 tsp vanilla extract
- 8 oz cream cheese, softened
- 1/4 cup powdered sugar
Instructions
- In a bowl, mix flour, sugar, and salt.
- Dissolve yeast in warm milk and let sit for 5 minutes.
- Add yeast mixture, melted butter, egg, cocoa powder, red food coloring, and vanilla to the dry ingredients. Mix well.
- Knead the dough for 5-7 minutes until smooth.
- Let the dough rise in a greased bowl for 1 hour or until doubled in size.
- Roll the dough into a rectangle.
- Spread softened cream cheese and powdered sugar mixture evenly over the dough.
- Roll the dough tightly and cut into 12 pieces.
- Place rolls in a baking dish and let rise for 30 minutes.
- Bake at 350°F for 20-25 minutes until golden.
Notes
- Use gel food coloring for a vibrant red color.
- Let the dough rise in a warm place for best results.
- Store leftovers in an airtight container for up to 3 days.
Nutrition
- Serving Size: 1 roll
- Calories: 220
- Sugar: 10g
- Sodium: 150mg
- Fat: 10g
- Saturated Fat: 6g
- Unsaturated Fat: 3g
- Trans Fat: 0g
- Carbohydrates: 28g
- Fiber: 1g
- Protein: 4g
- Cholesterol: 40mg