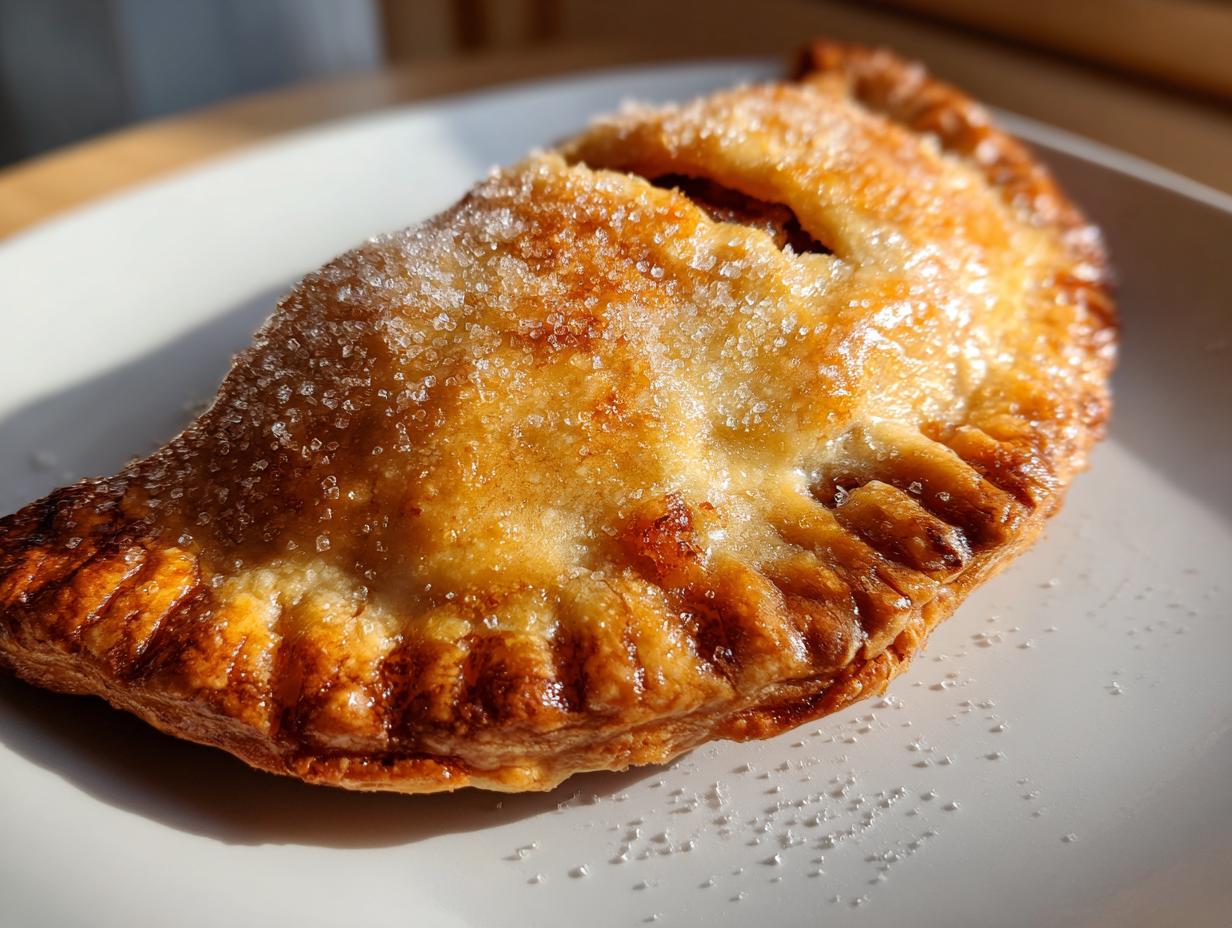
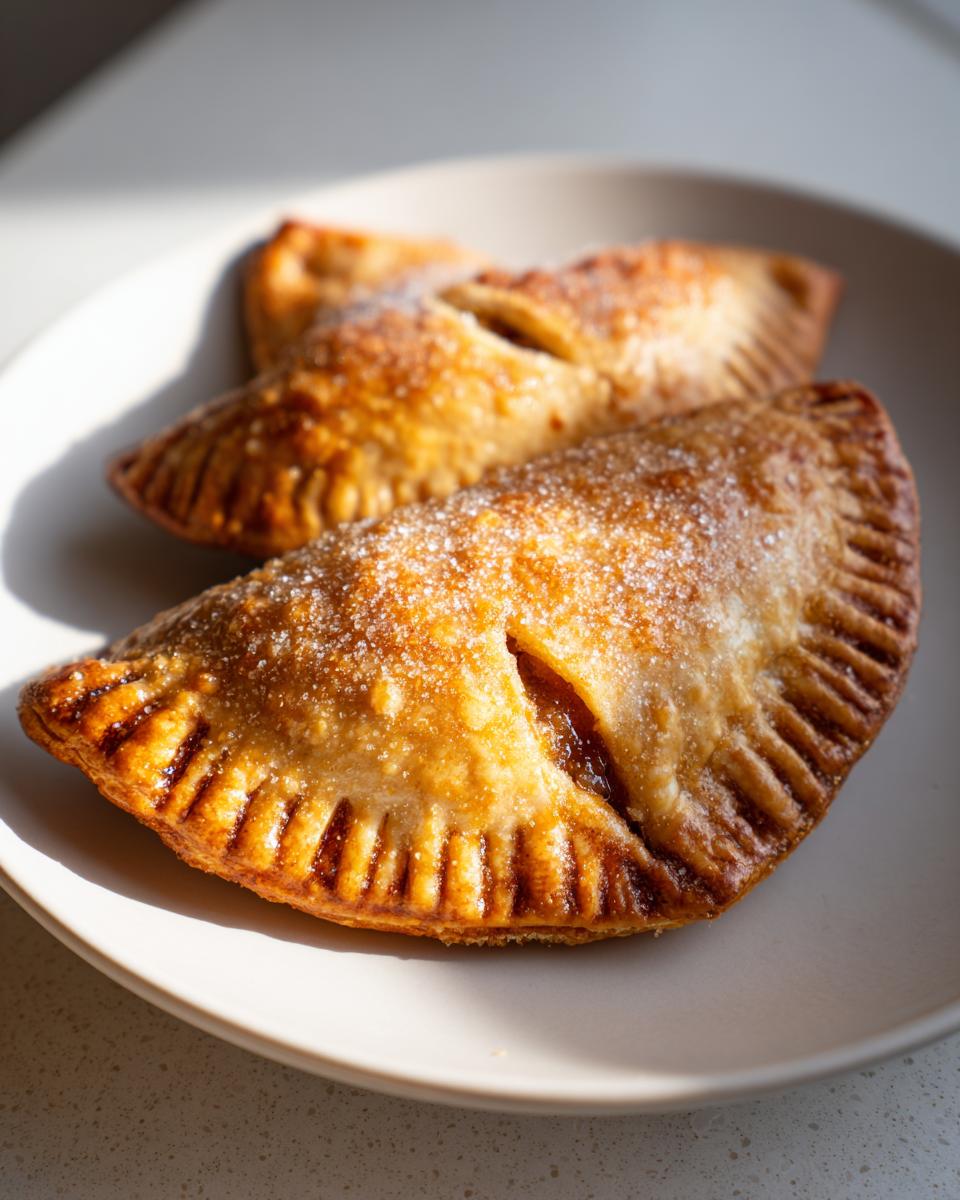
There’s something magical about a dessert you can hold in your hand – no plates, no forks, just pure portable deliciousness. My dried-apple hand pies take me right back to childhood road trips when my grandma would tuck these little pockets of joy into our lunchbox. They’ve got that perfect balance of sweet and tart, with dried apples that pack way more flavor than you’d expect. And let me tell you, the smell when these golden-brown beauties come out of the oven? Absolutely heavenly. These little pies are easier to make than you might think, and once you try them, you’ll want to keep a batch in your freezer at all times.
Why You’ll Love These Dried-Apple Hand Pies
Oh, where do I even start? These little hand pies are absolute game-changers. First off, they’re perfectly portable–toss them in a lunchbox, picnic basket, or even your purse (no judgment here!). But let me tell you what really makes them special:
- Flavor bombs: Dried apples concentrate all that apple goodness, so each bite packs way more punch than fresh apples ever could
- Customizable: Add walnuts for crunch, a dash of bourbon for grown-up flair, or swap in different spices
- Freezer-friendly: Make a big batch–they freeze beautifully for instant treats anytime
- Nostalgia factor: That first bite takes me right back to my grandma’s kitchen every single time
Seriously, once you try these, you’ll wonder how you ever lived without them!
Ingredients for Dried-Apple Hand Pies
Alright, let’s gather our goodies! I like to separate everything into filling ingredients and dough ingredients – it keeps me from accidentally putting cinnamon in the crust (again). Here’s what you’ll need:
For the Filling:
- 2 cups dried apples (trust me, the chewy texture is magic)
- 1/2 cup water (just enough to plump those apples up)
- 1/4 cup brown sugar (dark brown if you’ve got it – more molasses flavor!)
- 1 tsp cinnamon (the real MVP of spice)
- 1/4 tsp nutmeg (just a whisper – it’s strong stuff)
- 1 tbsp lemon juice (brightens everything up)
For the Dough:
- 2 cups all-purpose flour (spoon and level it, don’t scoop!)
- 1/2 tsp salt (balances the sweetness)
- 1/2 cup cold butter, cubed (I’m talking fridge-cold, not room temp)
- 4-6 tbsp ice water (yes, actual ice cubes in the water – crucial!)
- 1 egg, beaten (for that gorgeous golden shine)
- 1 tbsp coarse sugar (for that satisfying crunch on top)
See? Nothing too fancy – just good, honest ingredients that come together to make something truly special. Now let’s get baking!
How to Make Dried-Apple Hand Pies
Okay friends, let’s get our hands messy! Making these little pies is way easier than you’d think – just follow these steps and you’ll have golden, flaky pockets of joy in no time. I promise, even if you’re not a pie expert, you can totally rock this recipe.
Step 1: Prepare the Filling
First things first – let’s wake up those dried apples! Toss them in a saucepan with the water, brown sugar, cinnamon, nutmeg, and lemon juice. Turn the heat to medium and let everything get cozy together. You’ll want to stir occasionally (I use a wooden spoon – feels nostalgic!) as the apples soak up the liquid and the mixture thickens. About 10 minutes in, you’ll notice it’s transformed into this gorgeous, jammy consistency. That’s your cue to take it off the heat and let it cool. Pro tip: spread it on a plate to cool faster – hot filling makes for soggy dough, and nobody wants that!
Step 2: Make the Dough
While the filling cools, let’s make our dough. In a big bowl, whisk together the flour and salt. Now for the fun part – cutting in the butter! I use my fingers (washed, of course) to squish the cold butter cubes into the flour until it looks like coarse crumbs with some pea-sized butter bits still visible. This is what gives us those flaky layers! Now, drizzle in the ice water 1 tablespoon at a time, mixing gently with a fork until the dough just comes together. If it’s still crumbly, add another tablespoon – but don’t overdo it! Divide the dough into two equal disks, wrap them in plastic, and let them chill for about 15 minutes. This relaxes the gluten and makes rolling way easier.
Step 3: Assemble and Bake
Time to bring it all together! Roll out one dough disk to about 1/8-inch thickness on a lightly floured surface. Use a 4-inch round cutter (or a glass in a pinch!) to cut out circles. Spoon about a tablespoon of filling onto half the circles, leaving a border. Brush the edges with water, top with another circle, and crimp the edges with a fork – press firmly to seal those little pockets of joy! Brush the tops with beaten egg (this gives that beautiful golden color) and sprinkle with coarse sugar. Don’t forget to cut a couple small slits on top – they’re not just cute, they let steam escape so your pies don’t explode! Bake at 375F for 20-25 minutes until they’re golden brown and your kitchen smells like heaven. Let them cool just enough that you don’t burn your tongue – though I won’t judge if you can’t wait!
Tips for Perfect Dried-Apple Hand Pies
Alright, let me share my hard-earned secrets for hand pie perfection! First off, if that dough starts getting sticky while you’re rolling it, don’t panic – just pop it back in the fridge for 10 minutes. Cold dough is your friend here. Want to mix things up? Try adding a pinch of cloves or allspice to the filling – it gives such a cozy, warm flavor. Oh, and when rolling, aim for that magic 1/8-inch thickness – too thick and they’re doughy, too thin and they’ll burst. Store leftovers in an airtight container (if they last that long!), but they’re best eaten within 3 days. Pro tip: warm them slightly before serving – that filling just sings when it’s a little toasty!
Serving and Storing Dried-Apple Hand Pies
Oh, the possibilities with these little gems! My absolute favorite way to enjoy them is still warm from the oven with a scoop of vanilla ice cream melting over the top – the hot and cold combo is magical. For breakfast (don’t judge!), they pair perfectly with your morning coffee. Store any leftovers (ha!) in an airtight container at room temperature for up to 3 days. They’ll lose some crispness but still taste amazing – just pop them in the toaster oven for a quick refresh!
Dried-Apple Hand Pies Variations
Want to mix things up? Try swapping dried pears or peaches for apples – just as delicious! For extra crunch, stir in chopped walnuts or pecans to the filling. Feeling fancy? A splash of bourbon or rum with the apples adds grown-up flair. And if you’re feeling adventurous, grate some sharp cheddar right into the dough – trust me, the sweet-salty combo is unreal!
Dried-Apple Hand Pies FAQs
I get asked about these little pies all the time–here are the answers to everyone’s burning questions!
Can I use fresh apples instead of dried?
You can, but oh honey, you’ll miss out on that deep, concentrated apple flavor that makes these special! If you must, use 3 cups peeled/diced fresh apples and cook them down with the spices until very soft–but I promise the dried version is worth the extra step.
What’s the best way to freeze hand pies?
After baking and cooling completely, stack them in a single layer in an airtight container with parchment between layers. They’ll keep beautifully for 3 months! To reheat, just pop them frozen into a 350F oven for 10-15 minutes–good as new.
How thin should I roll the dough?
That magic 1/8-inch thickness is key–about the width of two stacked quarters. Any thicker and the crust overpowers the filling; any thinner and you risk leaks. Pro tip: roll from the center outward, turning the dough occasionally for even thickness.
My filling keeps leaking–help!
Two tricks: make sure your filling isn’t too wet (cool it completely!), and don’t overfill–a heaping tablespoon max per pie. And press those edges hard with the fork–I like to go around twice for good measure!
Nutritional Information
Just so you know what you’re biting into, here’s the scoop on these tasty little pies! (Remember, these are estimates – your exact numbers might vary depending on your ingredients.) Each hand pie packs about 280 calories, with 15g of sugar and 3g of fiber from those wonderful dried apples. They’ve got 12g of fat (7g saturated) and 4g of protein to keep you satisfied. Not too shabby for a handheld treat that tastes this good!
I’d absolutely love to hear how your dried-apple hand pies turn out! Snap a pic of your golden-brown creations and tag me–nothing makes me happier than seeing other bakers fall in love with this recipe. And if you’ve got any brilliant tweaks of your own, share those too! Happy baking, friends!
Print
5 Irresistible Dried-Apple Hand Pies that Taste Like Heaven
- Prep Time: 30 minutes
- Cook Time: 25 minutes
- Total Time: 55 minutes
- Yield: 8 hand pies 1x
- Category: Dessert
- Method: Baking
- Cuisine: American
- Diet: Vegetarian
Description
Delicious hand pies filled with dried apples and warm spices, perfect for a portable dessert or snack.
Ingredients
- 2 cups dried apples
- 1/2 cup water
- 1/4 cup brown sugar
- 1 tsp cinnamon
- 1/4 tsp nutmeg
- 1 tbsp lemon juice
- 2 cups all-purpose flour
- 1/2 tsp salt
- 1/2 cup cold butter, cubed
- 4–6 tbsp ice water
- 1 egg, beaten (for egg wash)
- 1 tbsp coarse sugar (for sprinkling)
Instructions
- Preheat oven to 375°F (190°C). Line a baking sheet with parchment paper.
- In a saucepan, combine dried apples, water, brown sugar, cinnamon, nutmeg, and lemon juice. Cook over medium heat until apples soften and liquid thickens, about 10 minutes. Remove from heat and let cool.
- In a bowl, mix flour and salt. Cut in butter until mixture resembles coarse crumbs.
- Gradually add ice water, 1 tbsp at a time, until dough comes together. Divide into two equal portions and shape into disks.
- Roll out each dough disk to 1/8-inch thickness. Cut into circles using a 4-inch cutter.
- Place a spoonful of apple filling in the center of half the circles. Top with remaining circles and crimp edges with a fork.
- Brush tops with egg wash and sprinkle with coarse sugar. Cut small slits on top for venting.
- Bake for 20-25 minutes or until golden brown. Cool slightly before serving.
Notes
- Store leftover pies in an airtight container for up to 3 days.
- For extra flavor, add a pinch of cloves or allspice to the filling.
- If dough becomes too sticky while rolling, chill for 10 minutes before continuing.
Nutrition
- Serving Size: 1 hand pie
- Calories: 280
- Sugar: 15g
- Sodium: 180mg
- Fat: 12g
- Saturated Fat: 7g
- Unsaturated Fat: 4g
- Trans Fat: 0g
- Carbohydrates: 40g
- Fiber: 3g
- Protein: 4g
- Cholesterol: 45mg